Measuring customer web traffic is important for eCommerce businesses, such as how they’re getting to each page, how long they’re staying there, and if they’re making a purchase. Google Analytics (GA4) is often the tool used by most businesses to measure these behaviours, helping inform future strategies. However, this data can be skewed by employee visits, or ‘internal web traffic’.
To make sure your data remains accurate, we’ve put together a simple but effective guide to help filter out internal web traffic from GA4.
There are times when members of your business will need to visit your site, such as to amend product pages, add marketing messages, or simply to review what’s in place. Members from the merchandising teams, marketing teams and beyond will have a reason to visit. The problem is that each visit and interaction will be tracked in GA4 by default, giving you inaccurate data about page popularity or a visitor’s site journey.
An even bigger consideration is that, as an eCommerce business, you may be using the same account details between a staging version of your site and the live version. This has the impact of skewing the data even more, let alone from any test orders placed from the staging site. The more the data is skewed, the bigger the problem internal web traffic becomes, making it difficult to react to product trends, create marketing campaigns or simply plan ahead.
However, there is a solution for filtering out internal traffic from GA4.
You can filter out specific web traffic in Google Analytics 4 by using its ‘Internal Traffic Filter’. This works by adding a ‘traffic_type’ parameter to every incoming event.
To do this, you’ll first need an Editor role at the property level of GA4. This will help you identify and amend filters. If you need to place this filter in place and are acting on behalf of someone more senior, then make sure to request Editor access from them or be granted permission before you proceed.
Once you have an Editor role, the first step will be to identify your internal traffic so this can be filtered out.
First, it’s worth knowing the IP addresses you wish to identify and filter out of internal traffic. If it’s your own IP, this can be identified later in the process. Once you have what you need, login to GA4.
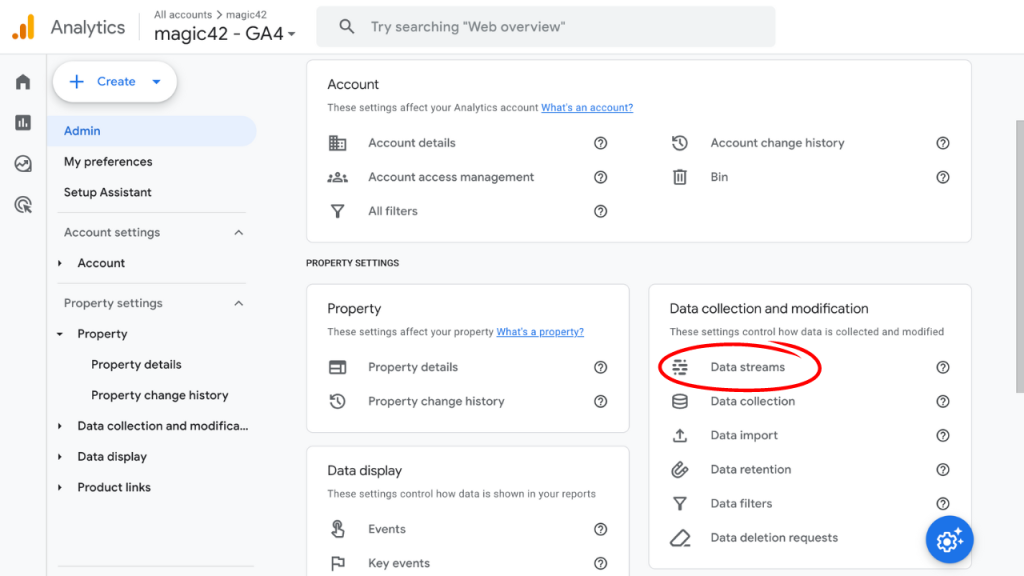
In GA4, click ‘Admin’ in the bottom left of the screen.
Head to the ‘Data collection and modifications’ section and click ‘Data streams’.
You will see a list of traffic data streams that will have been set up. Click one of these data streams - preferably the one you’d like to filter out of your analytics.
In the list that appears, click ‘Configure Tag Settings’.
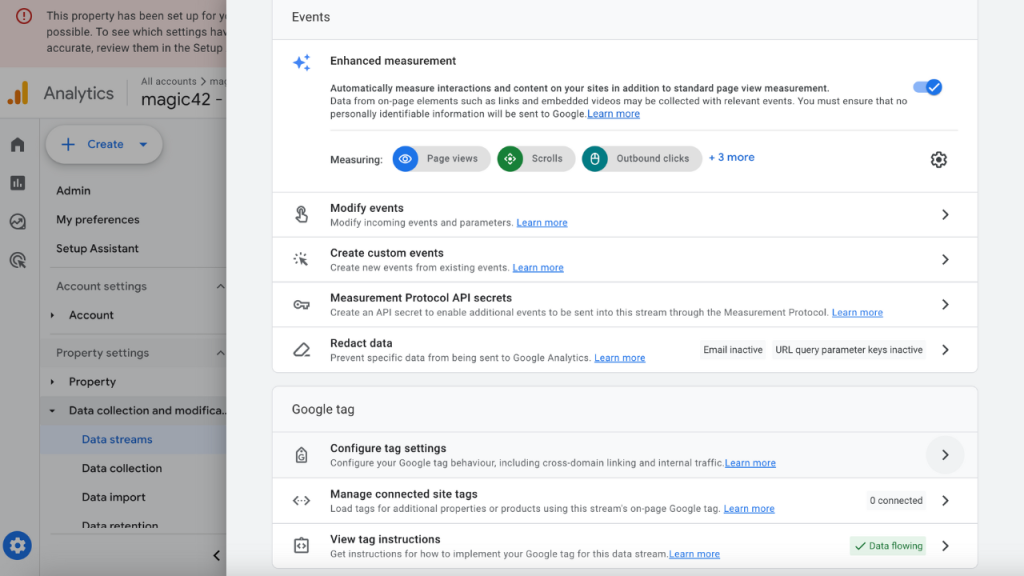
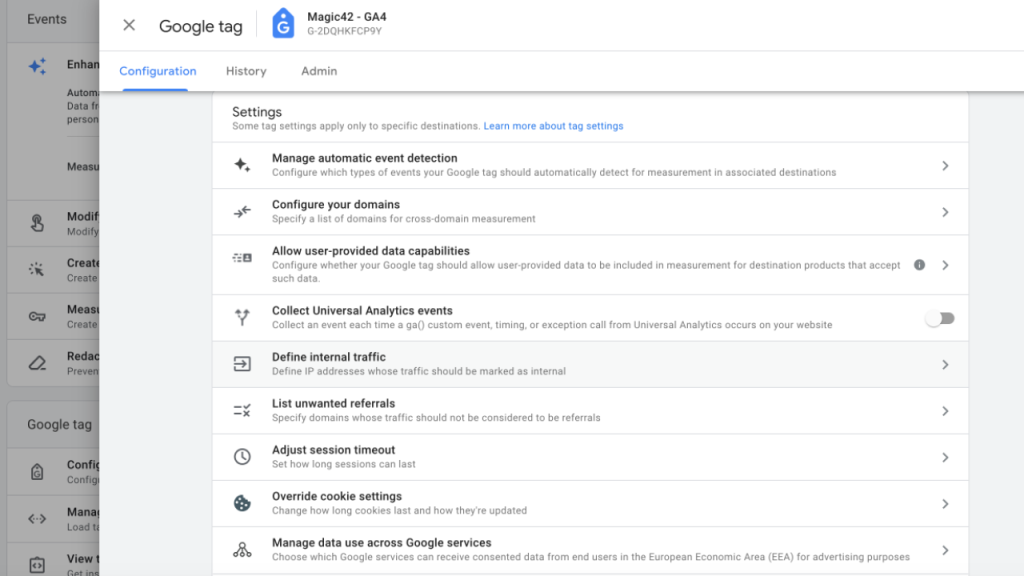
In the ‘Settings’ that appear, click ‘Show more’ to reveal all the tag settings. You can then click ‘Define Internal Traffic’ from the options that appear.
In the new window that appears, click ‘Create’. You can then enter a new ‘Rule name’ for the traffic, such as ‘Filter out internal traffic’, as well as a ‘traffic_type value’, such as ‘internal’.
Next, click the ‘IP address match type’ dropdown menu and select one of the options. We recommend ‘IP address equals’. You can then input the full IP address into the ‘Value’ field to its right. Do this for as many IP addresses as you’d like to identify and filter, using the ‘Add condition’ button.
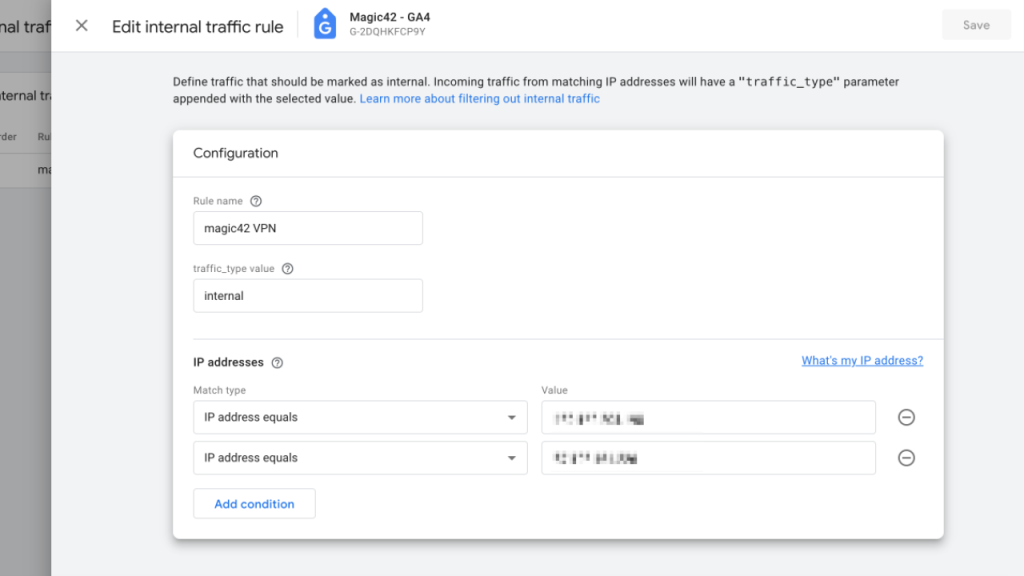
Click the blue ‘Create’ button to create the rule.
Google Analytics will now be able to identify those IP addresses in its data. With this set up, you can now make sure these are filtered out of reporting data in our next step.
First, click ‘Admin’ in the bottom left of the screen.
Head to the ‘Data Collections and Modifications’ section, then click ‘Data filters’.
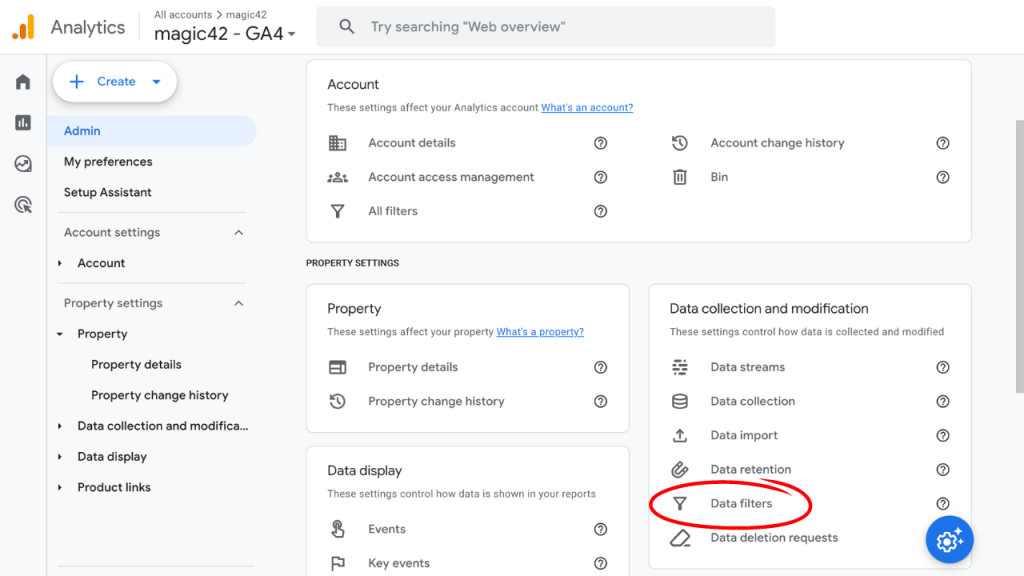
Click the ‘Create filter’ button.
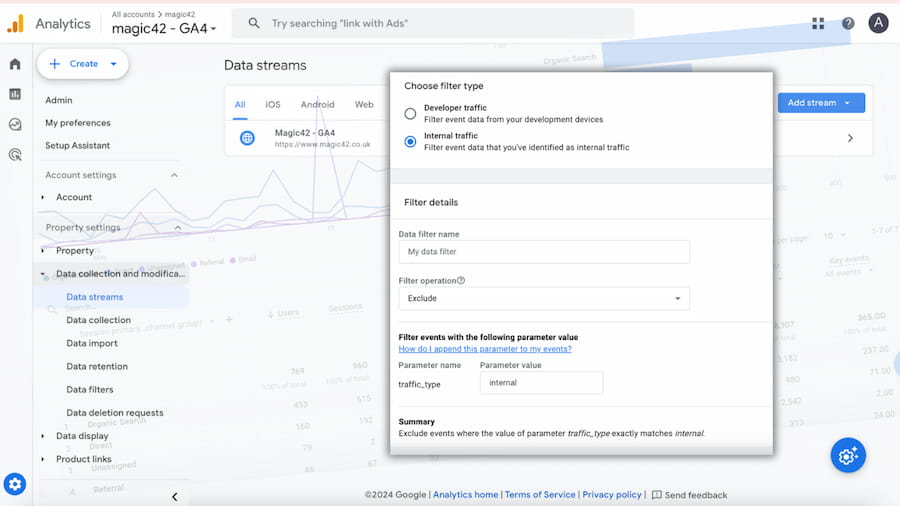
You can select your filter type, which in this case is ‘Internal traffic’.
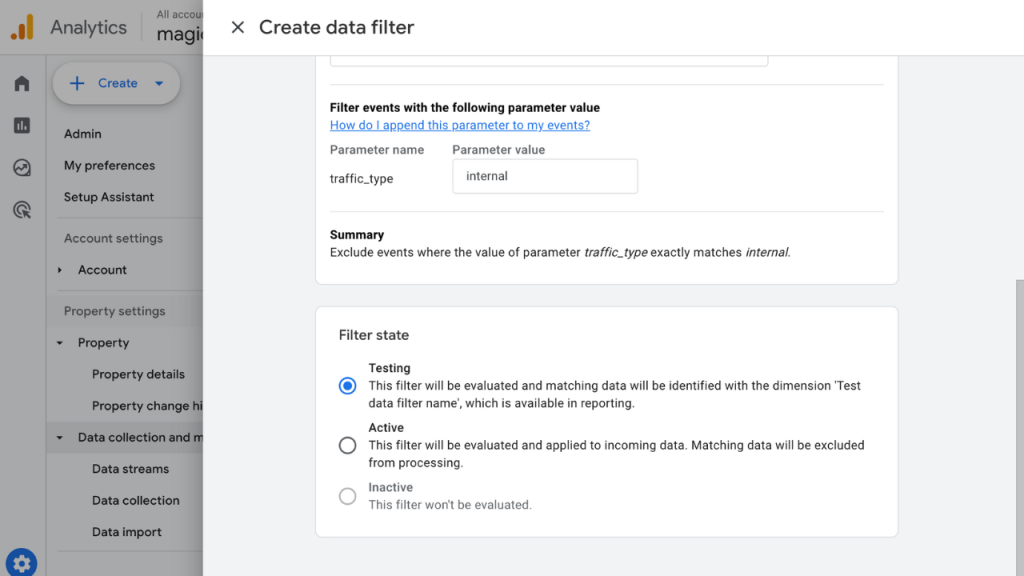
Fill out the ‘Data filter name’ you want to set, which should ideally be a descriptive name for the type of traffic you’d like to filter out. You can leave the ‘Filter operation’ field as ‘Exclude’.
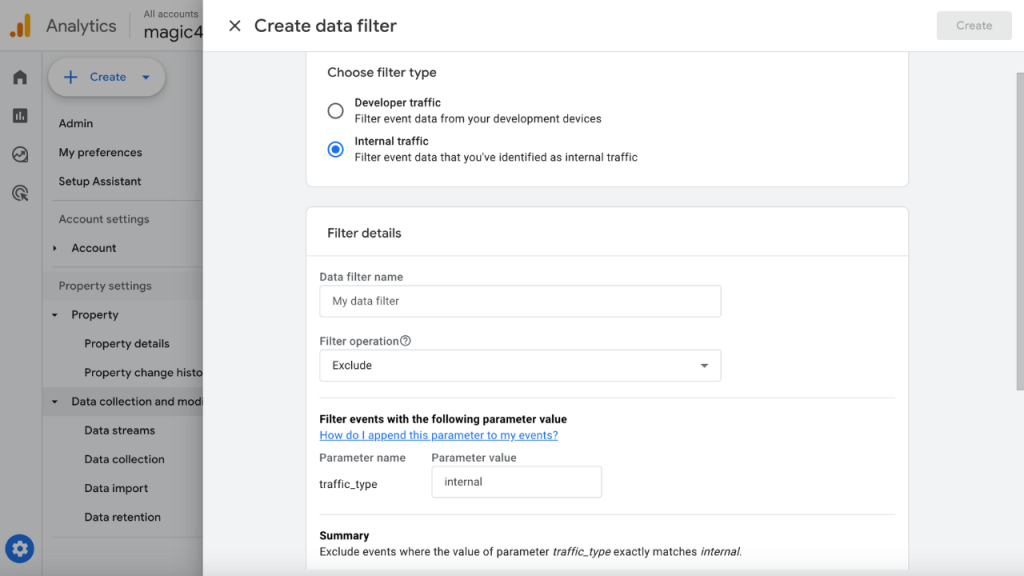
In the ‘Filter events with the following parameter value’ section, enter the ‘Parameter value’ name you set earlier (which is ‘internal’ in this example).
Under the ‘Filter state’ section on the same page, you’ll see states the filter can be in (‘Testing’, ‘Active’ and ‘Inactive’). It’s recommended to test the filter before fully activating it, using the ‘Testing’ field. You can activate the filter by returning here and clicking ‘Active’.
Once you are happy with the details, click the blue ‘Create’ button in the top right.
As alluded to earlier, the final step is to test your new data filter. Doing so will ensure it is correctly filtering out traffic from your selected IP addresses. This works by any filtered traffic from those IP addresses being added to the ‘Test data filter name’ dimension, with the filter name shown as its value.
Simply visit your site using the filtered IP address to make sure it is working correctly.
If your internal web traffic is still showing in GA4 instead of being filtered, then it may be worth tinkering with the settings to make sure you followed the above steps.
One thing worth noting is that it can take 24-36 hours for a new filter to apply in Google Analytics. Keep that in mind before going through the steps again or changing any existing settings to optimise GA4.
We also have plenty more advice to help you optimise GA4. For example, have you updated your data privacy regulations in line with the new Google Consent Mode v2 update, or made the correct changes for the new Gmail and Yahoo mail sending requirements? Or perhaps you’re looking to improve your Google data analysis further - have you checked for unwanted referrals in GA4?
For even more advice, why not reach out to see how our eCommerce development agency can help you?